Development Environment
The IDLE is useful to create short programs or try things in Python. In fact, I nearly always have an IDLE open when I'm working, as that lets you easily try things out and make sure that the things you are writing are valid. However, it is not great to write long and complex programs!
It is easier to do using an IDE (Integrated Development Environment). Undoubtedly the most popular IDE for Python is one called PyCharm, which I would advise installing and using. A link is available here.
You can download and install it for Mac, Windows, or Linux. Downloading PyCharm CE (Community Edition) is free, whereas the Professional Edition is not free.
Once it is downloaded, you can open it and create a new project. A project will be one application, such as the "age application" from the last section, or one of the many web applications we will be creating in the next sections.
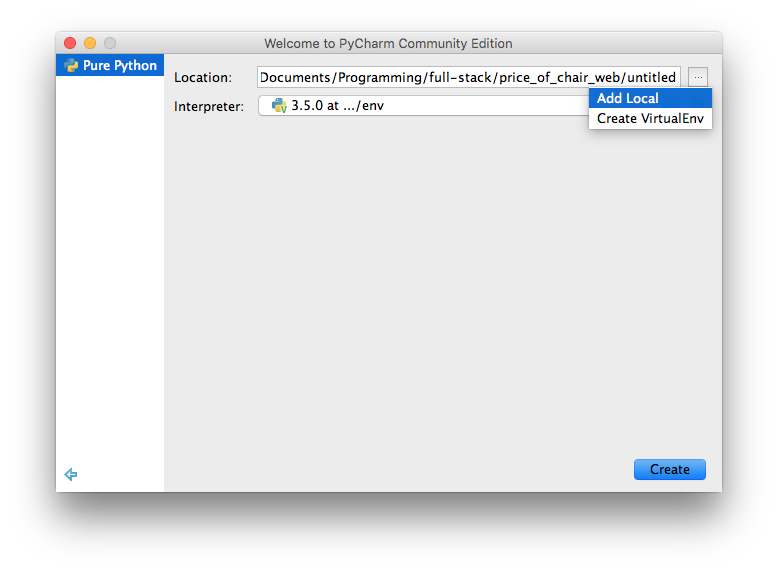
When you select "Create a new project" you will be prompted with a window like below:

And you will also have to choose an interpreter. This is what version of Python you will be using for this project. Remember that different versions of Python may be slightly different.
This is a good point to introduce Virtual Environments
Virtual Environments
A Virtual Environment is a Python installation that runs separately to another Python installations. This means that you can use Python 2.7 for one project and Python 3 for a different project, for example.
It also means that you can create a Virtual Environment for each project, and only install libraries that are necessary for a project in that project's Virtual Environment.
Let's create a Virtual Environment for our new project, by pressing the cog icon beside the "Interpreter" drop-down:
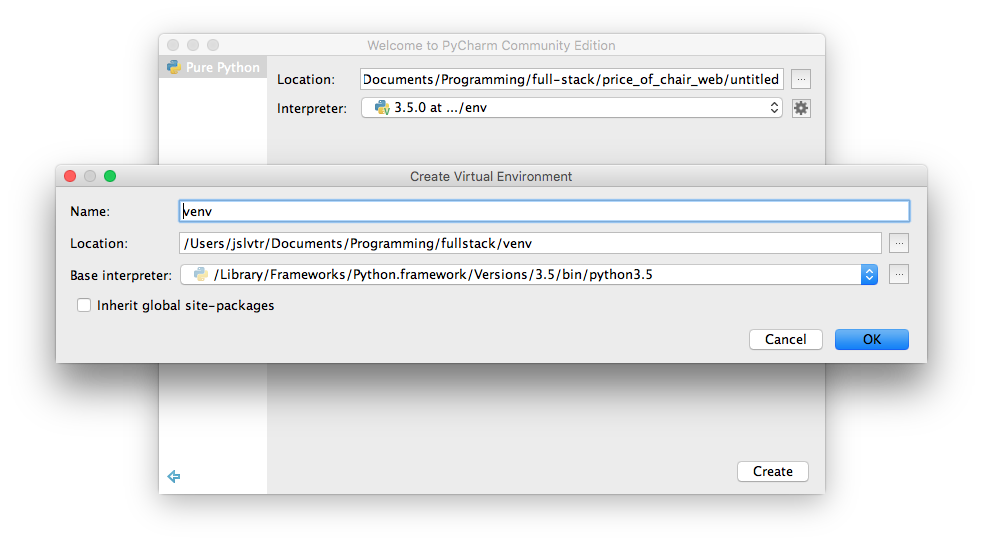
We now have to choose the "Base interpreter". This is so we can create a Virtual Environment using a specific Python version (i.e. one of 2.7, 3.3, 3.5, or any other Python version). The drop-down will show the available Python versions in your computer:

Remember to choose the location of the Virtual Environment and the name of the folder where the Virtual Environment will live. The name is usually venv.
Finally, we can create!
When your Virtual Environment has been created, you now have a separate Python installation that will be used by PyCharm to run your project. If your project requires any libraries (which it will, in this section), PyCharm will install those libraries in the Virtual Environment, as opposed to in your general system install.
Part of the good thing about this is that you then are not saturating your system install with required libraries, instead only install required libraries in the appropriate Virtual Environment.